Before You Start
Make sure you have:
- Your WordPress login username and password
- The blog post text ready (you can write it in Word first if that’s easier)
- Any images you want to include (saved on your computer
Step 1: Log In
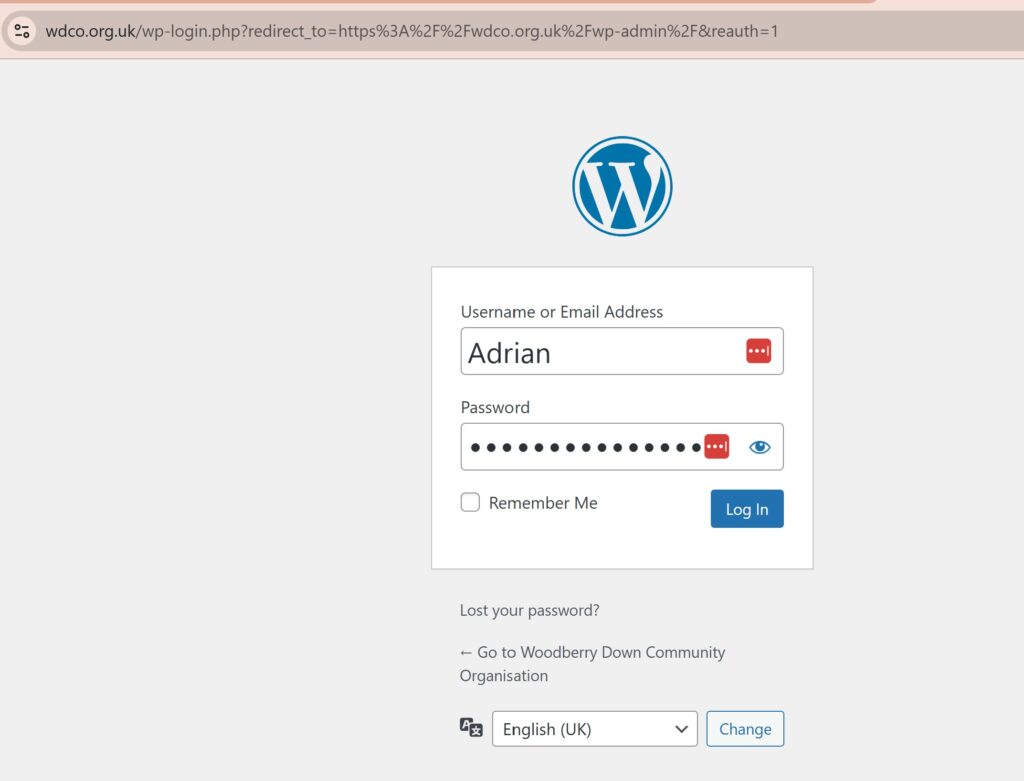
- Go to your WDCO website address and add
/wp-admin/to the end
- That is :
www.wdco.org.uk/wp-admin/
- Enter your username and password
- Click “Log In”
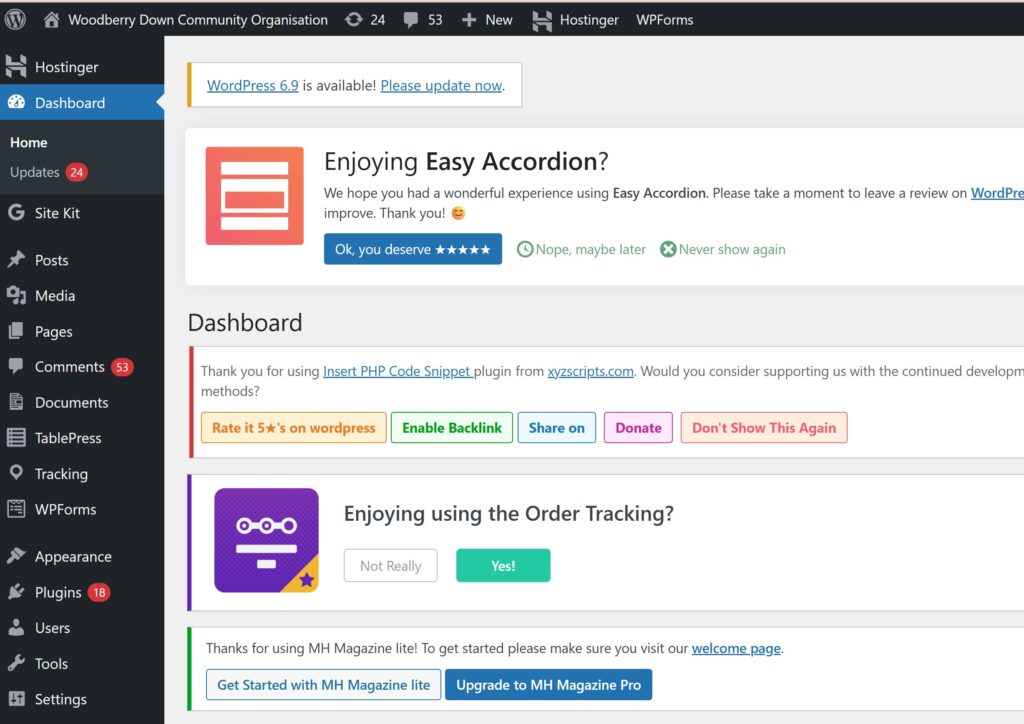
You’ll see a dashboard with lots of menu options on the left side.
Step 2: Start a New Post
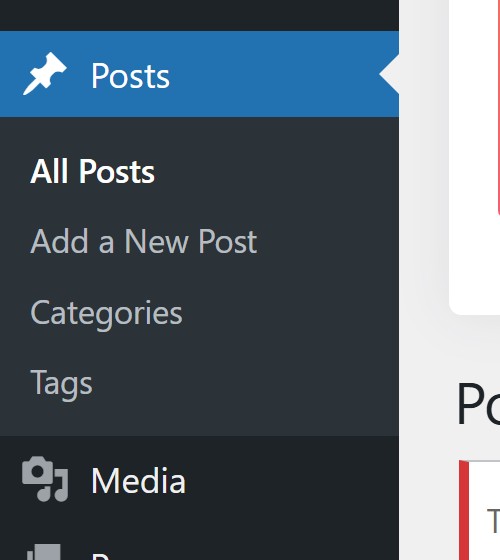
- On the left menu, look for Posts (hover over this to open the options)
- Click on Add New
You’ll see a blank form with a title box and a big text area below it.
Step 3: Add Your Title
Click in the box at the top that says “Add title” and type your blog post title.
That’s it. This is the headline that will appear on the website.
Step 4: Write Your Content
Click in the big text area below the title and type (or paste) your blog post content.
Helpful tips:
- You can press Enter to create new paragraphs (just like in Word)
- To make text bold, highlight it and click the B button in the toolbar
- To make text italic, highlight it and click the I button in the toolbar
The toolbar works just like Word – don’t be afraid to explore the buttons.
Step 5: Add an Image (Optional)
If you want to include a picture:
- Click the + button or Add block button (you’ll see these in the editor)
- Look for Image in the menu that appears
- Click Upload and select an image from your computer
- The image will appear in your post
If you’re not sure where these buttons are, ask Adrian – they’re in slightly different places depending on your WordPress version.
Step 6: Review Your Post
Before publishing, scroll down and look at the preview (if available). This is what your post will look like to visitors.
Check:
- Title looks good
- Text reads well
- Images are in the right place
- No spelling mistakes (you can use your browser’s spell-check)
Step 7: Publish
Scroll down to the right side of the screen. You’ll see a box labeled Publish or Status.
Click the blue Publish button.
That’s it. Your post is now live on the website.
After Publishing
Your post will appear in the blog section automatically (because of the theme you’re using). People visiting the site will be able to see it.
If You Get Stuck
- Don’t panic – WordPress is forgiving. You can save as a draft and come back to it.
- Look for the Save Draft button to save without publishing
- Ask Adrian if anything doesn’t match this guide (WordPress updates sometimes change the layout slightly)
Quick Reference: Where Things Are
| What You Want | Where to Find It |
|---|---|
| Start a new post | Left menu → Posts → Add New |
| See all your posts | Left menu → Posts |
| Publish your post | Blue button on the right side |
| Save without publishing | Look for “Save Draft” option |
| Add an image | Click the + or Add block button in the text editor |
| Make text bold or italic | Highlight text and click B or I in the toolbar |
That’s all you need to know. You’ve got this!